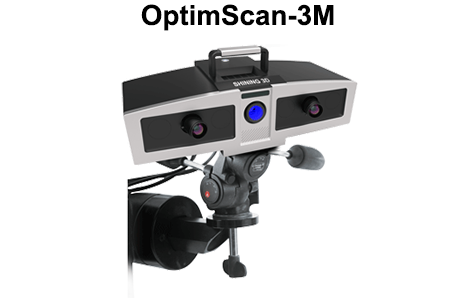
OptimScan-3M Metrology 3D Scanner

[vc_row wrap_container=”yes” is_section=”yes” section_skin=”parallax” remove_margin_top=”yes” remove_margin_bottom=”yes” remove_border=”yes”][vc_column width=”1/2″ offset=”vc_col-md-8″][vc_column_text]OptimScan-3M 3D scanner is the standard 3D scanner released by Shining 3D. Equipped with 3 mega pixels cameras and latest blue light scanning technology, it has wide application due to its excellent performance.[/vc_column_text][/vc_column][vc_column width=”1/2″ offset=”vc_col-md-4″][vc_single_image image=”1497″ img_size=”full” alignment=”center” onclick=”link_image” el_class=”box-shadow-custom inline-block m-t-md m-b-md” label=””][/vc_column][/vc_row][vc_row wrap_container=”yes” is_section=”yes” section_skin=”parallax” remove_margin_top=”yes” remove_margin_bottom=”yes” remove_border=”yes”][vc_column width=”1/2″ offset=”vc_col-md-4″][vc_single_image image=”1498″ img_size=”full” alignment=”center” onclick=”link_image” el_class=”box-shadow-custom inline-block m-t-md m-b-md” label=””][/vc_column][vc_column width=”1/2″ offset=”vc_col-md-8″][vc_column_text]High Accuracy, 0.007mm for Single Scan Accuracy

Reference points optimization, overall accuracy could reach 0.1mm/m

Accuracy measuring is done according to German neasuring inspection standard VDI/VDE2634

[/vc_column_text][/vc_column][/vc_row][vc_row wrap_container=”yes” is_section=”yes” section_skin=”parallax” remove_margin_top=”yes” remove_margin_bottom=”yes” remove_border=”yes”][vc_column width=”1/2″ offset=”vc_col-md-4″][vc_single_image image=”1499″ img_size=”full” alignment=”center” onclick=”link_image” el_class=”box-shadow-custom inline-block m-t-md m-b-md” label=””][/vc_column][vc_column width=”1/2″ offset=”vc_col-md-8″][vc_column_text]High Speed Scan, Less than 2 Seconds for Single Scan

It takes only a few minutes for small parts scanning

It takes around 30 minutes to scan a 1 meter long object(it varis for different operators)

[/vc_column_text][/vc_column][/vc_row][vc_row wrap_container=”yes” is_section=”yes” section_skin=”parallax” remove_margin_top=”yes” remove_margin_bottom=”yes” remove_border=”yes”][vc_column width=”1/2″ offset=”vc_col-md-4″][vc_single_image image=”1500″ img_size=”full” alignment=”center” onclick=”link_image” el_class=”box-shadow-custom inline-block m-t-md m-b-md” label=””][/vc_column][vc_column width=”1/2″ offset=”vc_col-md-8″][vc_column_text]Adjustable Scan Ranges

3 sets of scan ranges are available

Freely adjustable

More convenient and suitable

[/vc_column_text][/vc_column][/vc_row][vc_row wrap_container=”yes” is_section=”yes” section_skin=”parallax” remove_margin_top=”yes” remove_margin_bottom=”yes” remove_border=”yes”][vc_column width=”1/2″ offset=”vc_col-md-4″][vc_single_image image=”1501″ img_size=”full” alignment=”center” onclick=”link_image” el_class=”box-shadow-custom inline-block m-t-md m-b-md” label=””][/vc_column][vc_column width=”1/2″ offset=”vc_col-md-8″][vc_column_text]

Fasting Scan speed

Single scan time is under 1.5 seconds

Data registration is free to switch between automatic alignment and manual alignment.

[/vc_column_text][/vc_column][/vc_row][vc_row wrap_container=”yes” is_section=”yes” section_skin=”parallax” remove_margin_top=”yes” remove_margin_bottom=”yes” remove_border=”yes”][vc_column width=”1/2″ offset=”vc_col-md-4″][vc_single_image image=”1502″ img_size=”full” alignment=”center” onclick=”link_image” el_class=”box-shadow-custom inline-block m-t-md m-b-md” label=””][/vc_column][vc_column width=”1/2″ offset=”vc_col-md-8″][vc_column_text]Suitable for Scanning Objects with Complex Surfaces, Soft Objects’ Overall Inspection and Measurement

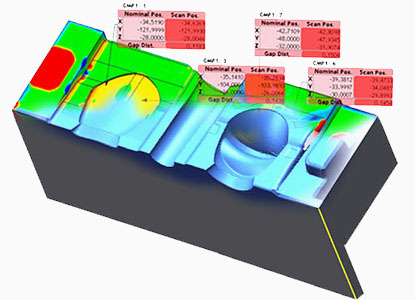
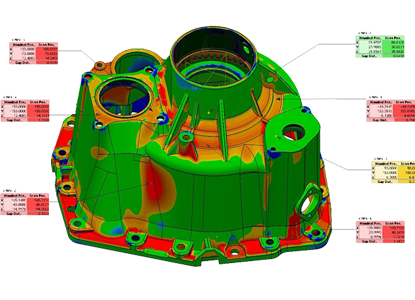
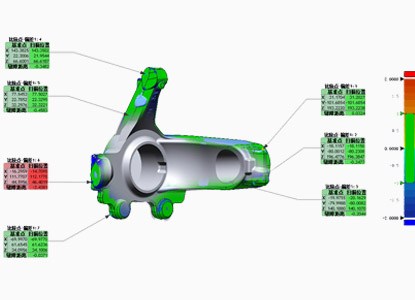
Non-contact 3D scanning can be applied in complex component like turbine blade measurement and inspection, consuming around 10% of the total time needed with traditional CMM system. Not only faster, but also full dimension inspection and measurement can be carried out.

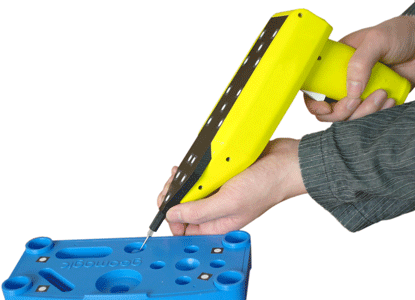
[/vc_column_text][/vc_column][/vc_row][vc_row wrap_container=”yes” is_section=”yes” section_skin=”parallax” remove_margin_top=”yes” remove_margin_bottom=”yes” remove_border=”yes”][vc_column width=”1/2″ offset=”vc_col-md-4″][vc_single_image image=”1503″ img_size=”full” alignment=”center” onclick=”link_image” el_class=”box-shadow-custom inline-block m-t-md m-b-md” label=””][/vc_column][vc_column width=”1/2″ offset=”vc_col-md-8″][vc_column_text]3D Probe

Single scan accuracy could reach 0.005mm

  • Compatible with OptimScan-3M/5M
  • Easily measuring the positions that non-contacted scanning is inaccessible, such as very deep holes
  • Optical CMM measurement technology
  • Wireless bluetooth transmission
  • Light and portable design

[/vc_column_text][/vc_column][/vc_row][vc_row][vc_column][vc_zigzag][/vc_column][/vc_row]